
How to Choose Quality Flooring?
September 8, 2021
How Long Can Outdoor Decking Last Under Sunlight?
October 26, 2021How To Repair Wood Flooring From Puppy Scratches?

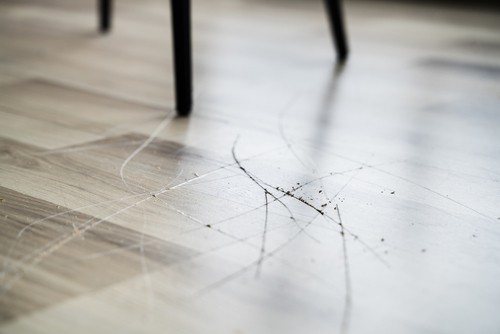
How to repair wood flooring from puppy scratches? Repairing scratches on hardwood floors is not a difficult task. If you can finish the repair to your satisfaction, very few people should notice that repair work was ever done to the wood or laminate floor. Hardware cloth is the best repair material for claw marks on wood floors.
Hardware cloth can be purchased at most hardware stores and has smaller openings than chicken wire, making it much easier to repair noticeable scratches. It also comes in rolls or even precut shapes making repair easy.
Read on – How To Repair Wood Flooring From Puppy Scratches?
Table of Contents
Putty Knife Or Razor Blade Scraper

The first step is to scrape out any loose coating using an old putty knife or single edge razor blade scraper (work outside if the layer is lead-based). Ensure all flexible coatings have been removed from scratch, or repair work will be noticeable once complete.
Next, repair any split wood using a wood repair system such as an epoxy repair kit. If you do not have access to repair kits, super glue may repair split wood areas. Allow the repair to completely dry, which usually takes longer than the package directions state. Repair kits must be used if there was lead-based paint in your home at one time because it can cause health hazards if inhaled or ingested by children and pets.
Superglue may repair split wood areas.

Once dried, you should have a smooth surface under the scratch mark with no repairable damage to the floor. Make sure repair is not noticeable by running your fingers over repair work and looking for low areas where the repair has been done. If repair is not smooth, add a top layer of water-based polyurethane to the repair area, which should eliminate any low spots created from scraping or sanding.
If repair work was done on both sides of the scratch mark, compare repair work and match before applying finish coats. Remember: only do one coat of finish at a time so you can match existing finishes in your home if necessary. When adding multiple coats of finish, it won’t be easy to match all existing finishes once complete.
Many pet owners dread when their pets dig into the wood floors as much as they do. The wood floor repair cost may be a bit higher than your regular repair price, but it can be done without too much trouble by whoever is handy enough to do it.
8 Tips On Repairing Scratches On Your Hardwood Flooring:
Tip #1 – Prepare the damaged area
Before actually repairing the damages, you should prepare the surface first. Use 120-grit sandpaper and lightly tap down all jagged edges and corners around the damage so that it will be nice and smooth instead of pointy or lumpy. You want to make sure that there aren’t any splinters because you don’t want your pets to get hurt or even cause them to develop an allergy.
Tip #2 – Repair the damage
After preparation, repair the damaged area by using a wood filler that matches your hardwood floor color as closely as possible. Try not to apply too much of it because once it dries up, you’d only need a tiny bit of sanding for it to blend in thoroughly with the rest of the floor. You also need to make sure that you put on several thin coats and let each of them dry up before applying another coat until filling and repair work is complete.
Tip #3 – Sanding
Now for this step, use 220-grit sandpaper and carefully sand down the entire repair area until it is smooth and even with the rest of your hardwood floor. You can also use a disc sander if you have one to speed up the process. But don’t simply erase all repair work so far by going crazy with your sander because you might end up making things more noticeable instead of blending in.
You’ll know that repair work has been done successfully when there aren’t any visible lines or edges on the repair patch anymore. However, to make sure that repair work is done correctly, it’s best if you go over the repair area again using fine-grit sandpaper (at least 600-grit or even finer if possible).
Tip #4 – Apply Finish
You can use either oil-based or water-based finish depending on the repair work you’ve done and the original condition of your hardwood floor. However, it’s generally recommended that you use varnish with at least three coats to ensure that repair work stays in place and doesn’t come off quickly. It would be best to let each coat dry up (overnight would be great) before applying another coat of finish.
Tip#5 – Protect Finishing Job
After all repair work has been done, protection is essential so that the finishing job won’t get damaged again due to scratching by our pets. Be sure to put down some rugs or carpets and pads and, if possible, consider investing in protective film or coating that can be applied to repair work for added protection.
Tip #6 – Prevent Pets from Scratching Again
Unfortunately, there aren’t any magic solutions for getting rid of pets as your housemates, but you can make some changes around the house, like keeping pet food and water bowls in a different area so that it won’t have access to your hardwood flooring repair.
Extra Tips:

Preparing damaged areas is a must before repair work begins. Don’t forget this step. Always prepare first, then repair! – Apply thin coats of filler instead of one thick coat so it will dry up faster and have less chance of drying unevenly
There are a few different types of hardwood floor repair products available on the market. Which one you should buy depends on your specific repair need and how much money you’re willing to spend on repair work. Below are some examples:
Solid Wood Flooring Repair Kits
Solid wood floor repair kits come in precise pieces that need to be glued onto the damaged area using the adhesive provided with purchase. It’s easy to use but not as durable as other repair products, so if your pet is very likely to damage it again, then this repair kit might not last for very long.
Polyurethane Wood Filler
This repair material will be a perfect choice if you want a more permanent repair job because it provides better durability compared to repair kits. To use, you’ll need a putty knife and primer in addition to repairing the product itself. Apply the filler using a putty knife, make sure it’s smooth, and even then, let dry completely.
Other Repair Options
This would include repair patches that can be cut easily with scissors if the repair area is small enough or repair molding that comes in all sorts of shapes and sizes depending on your specific repair needs. You may also want to use a repair kit that includes finish, so you’ll have less work later on after the repair is complete.
How To Repair Wood Flooring From Puppy Scratches? – Conclusion

Now repairing wood floor damage doesn’t have to be complicated or confusing, especially if you know what repair products are available and how they should be used. If you repair wood flooring yourself or are planning to repair it, investing in repair products beforehand can save you money in the long run.
So, instead of hiring a maintenance specialist every time your pets damage your hardwood floors, repair them yourself using repair kits, putty knives, and sanders.


